The Evolution and Future Trajectories of Machine Learning Venues
In the rapidly expanding field of artificial intelligence (AI), machine learning venues have emerged as crucibles for innovation, collaboration, and discourse. As someone deeply immersed in the intricacies of AI, including its practical applications and theoretical underpinnings, I’ve witnessed firsthand the transformative power these venues hold in shaping the future of machine learning.
Understanding the Significance of Machine Learning Venues
Machine learning venues, encompassing everything from academic conferences to online forums, serve as pivotal platforms for advancing the field. They facilitate a confluence of ideas, fostering an environment where both established veterans and emerging talents can contribute to the collective knowledge base. In the context of previous discussions on machine-learning venues, it’s clear that their impact extends beyond mere knowledge exchange to significantly influence the evolution of AI technologies.
Key Contributions of Machine Learning Venues
- Disseminating Cutting-Edge Research: Venues like NeurIPS, ICML, and online platforms such as arXiv have been instrumental in making the latest machine learning research accessible to a global audience.
- Facilitating Collaboration: By bringing together experts from diverse backgrounds, these venues promote interdisciplinary collaborations that drive forward innovative solutions.
- Shaping Industry Standards: Through workshops and discussions, machine learning venues play a key role in developing ethical guidelines and technical standards that guide the practical deployment of AI.
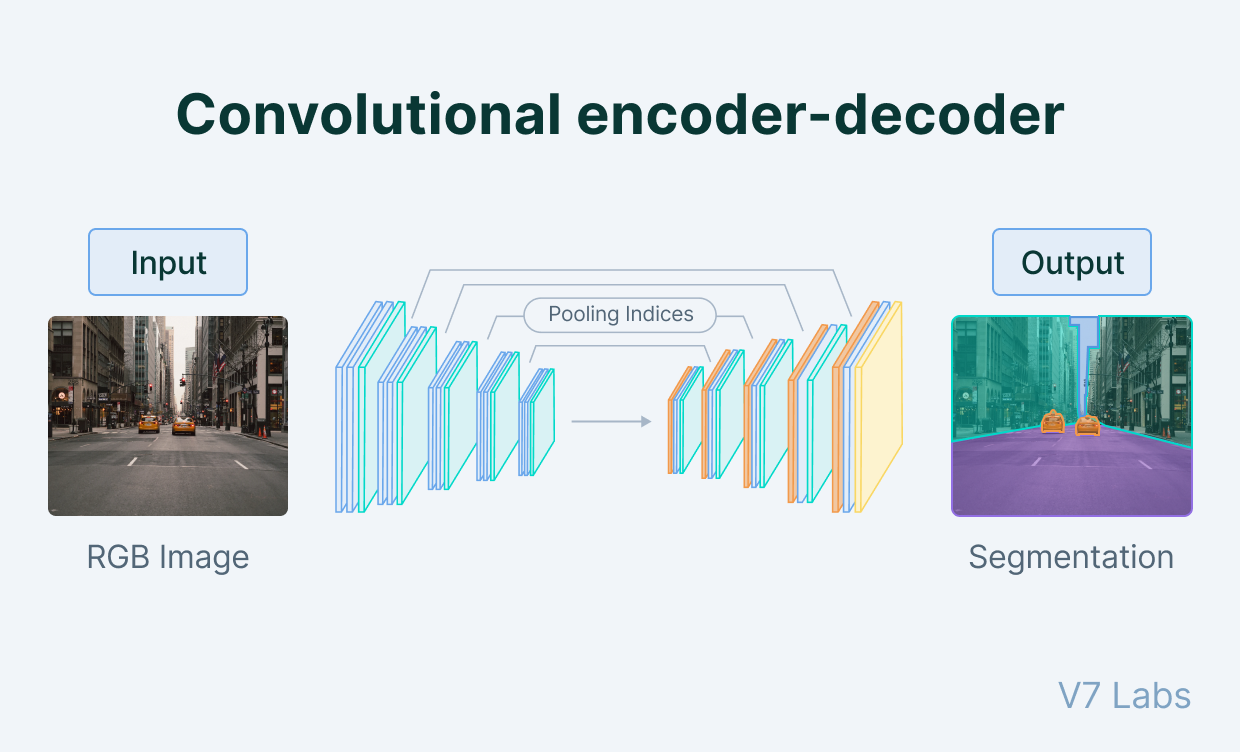
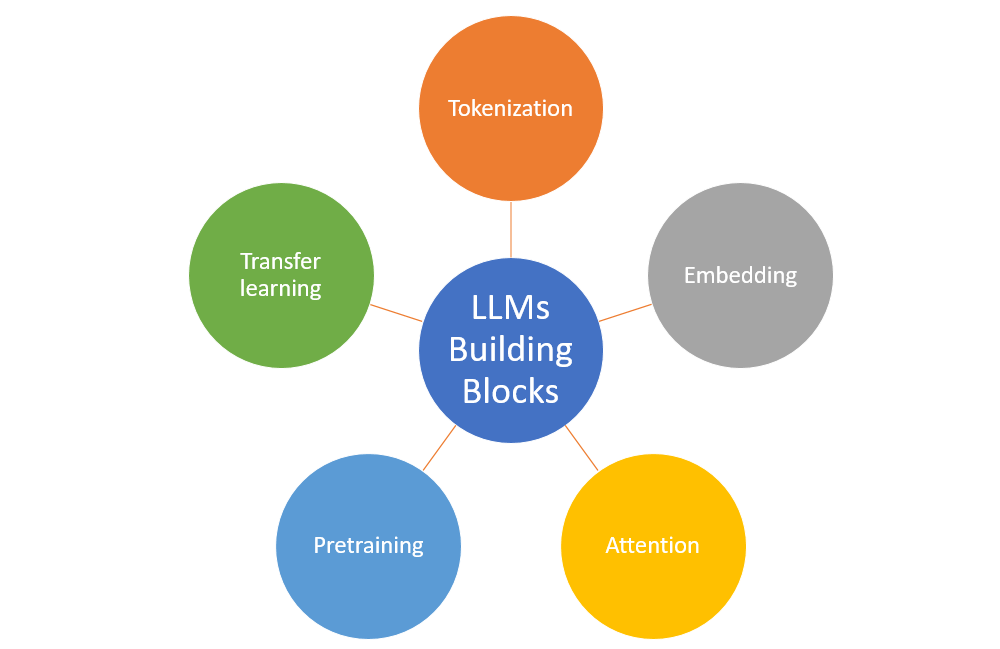
Delving into the Details: Large Language Models
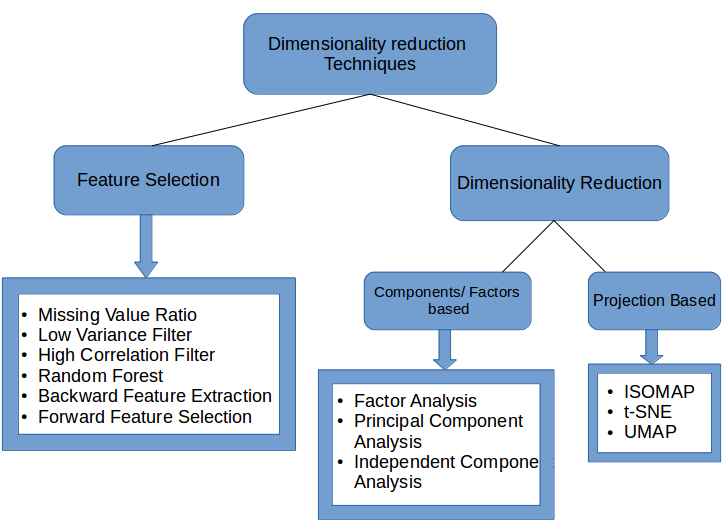
The discussion around large language models (LLMs) at these venues has been particularly animated. As explored in the article on dimensionality reduction and its role in enhancing large language models, the complexity and capabilities of LLMs are expanding at an exponential rate. Their ability to understand, generate, and interpret human language is revolutionizing fields from automated customer service to content creation.
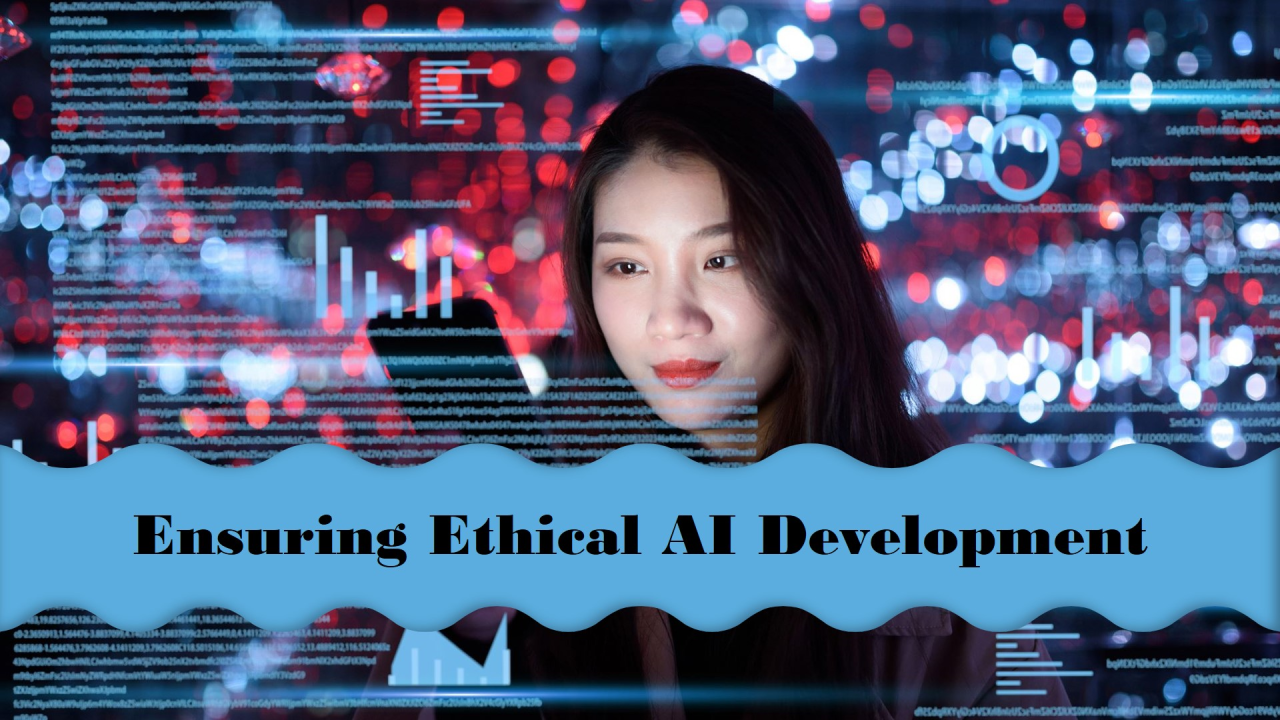
Technical Challenges and Ethical Considerations
However, the advancement of LLMs is not without its challenges. Topics such as data bias, the environmental impact of training large models, and the potential for misuse have sparked intense debate within machine learning venues. Ensuring the ethical development and deployment of LLMs necessitates a collaborative approach, one that these venues are uniquely positioned to facilitate.
Code Snippet: Simplifying Text Classification with LLMs
# Python pseudocode for using a pre-trained LLM for text classification
from transformers import AutoModelForSequenceClassification, AutoTokenizer

# Load model and tokenizer
model_name = "example-llm-model-name"
model = AutoModelForSequenceClassification.from_pretrained(model_name)
tokenizer = AutoTokenizer.from_pretrained(model_name)

# Classify text
text = "Your text goes here."
inputs = tokenizer(text, return_tensors="pt")
outputs = model(**inputs)

# Parse and display classification results
predictions = outputs.logits.argmax(-1)
print(f"Classified text as: {predictions}")
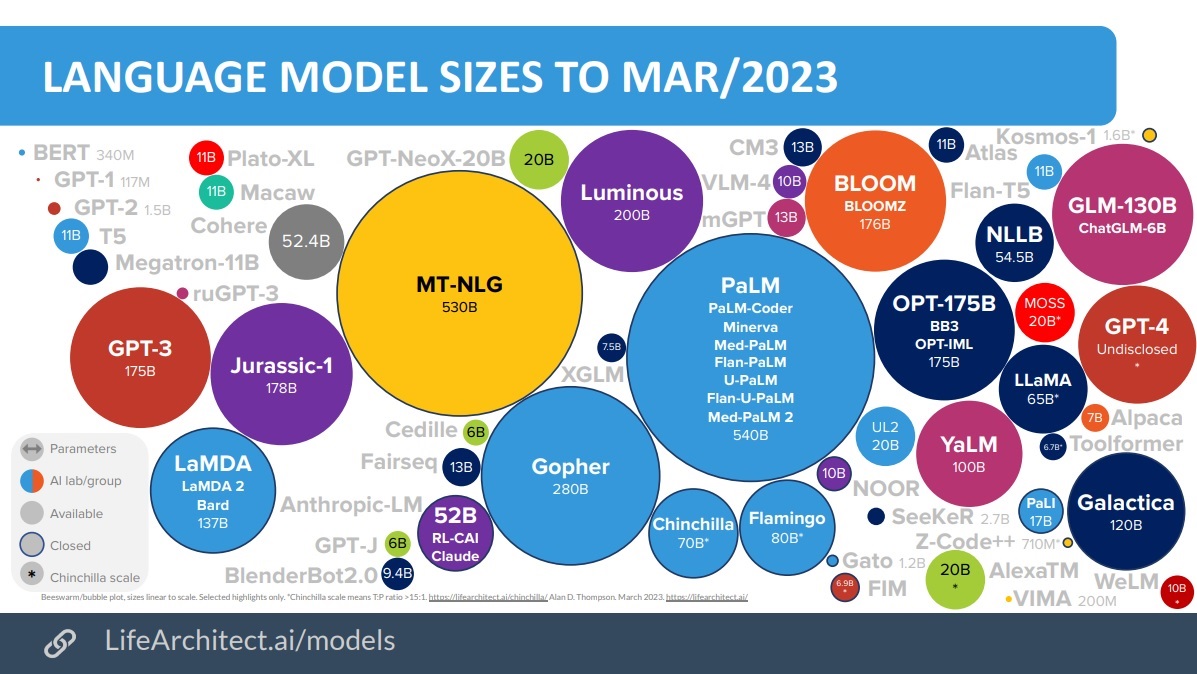
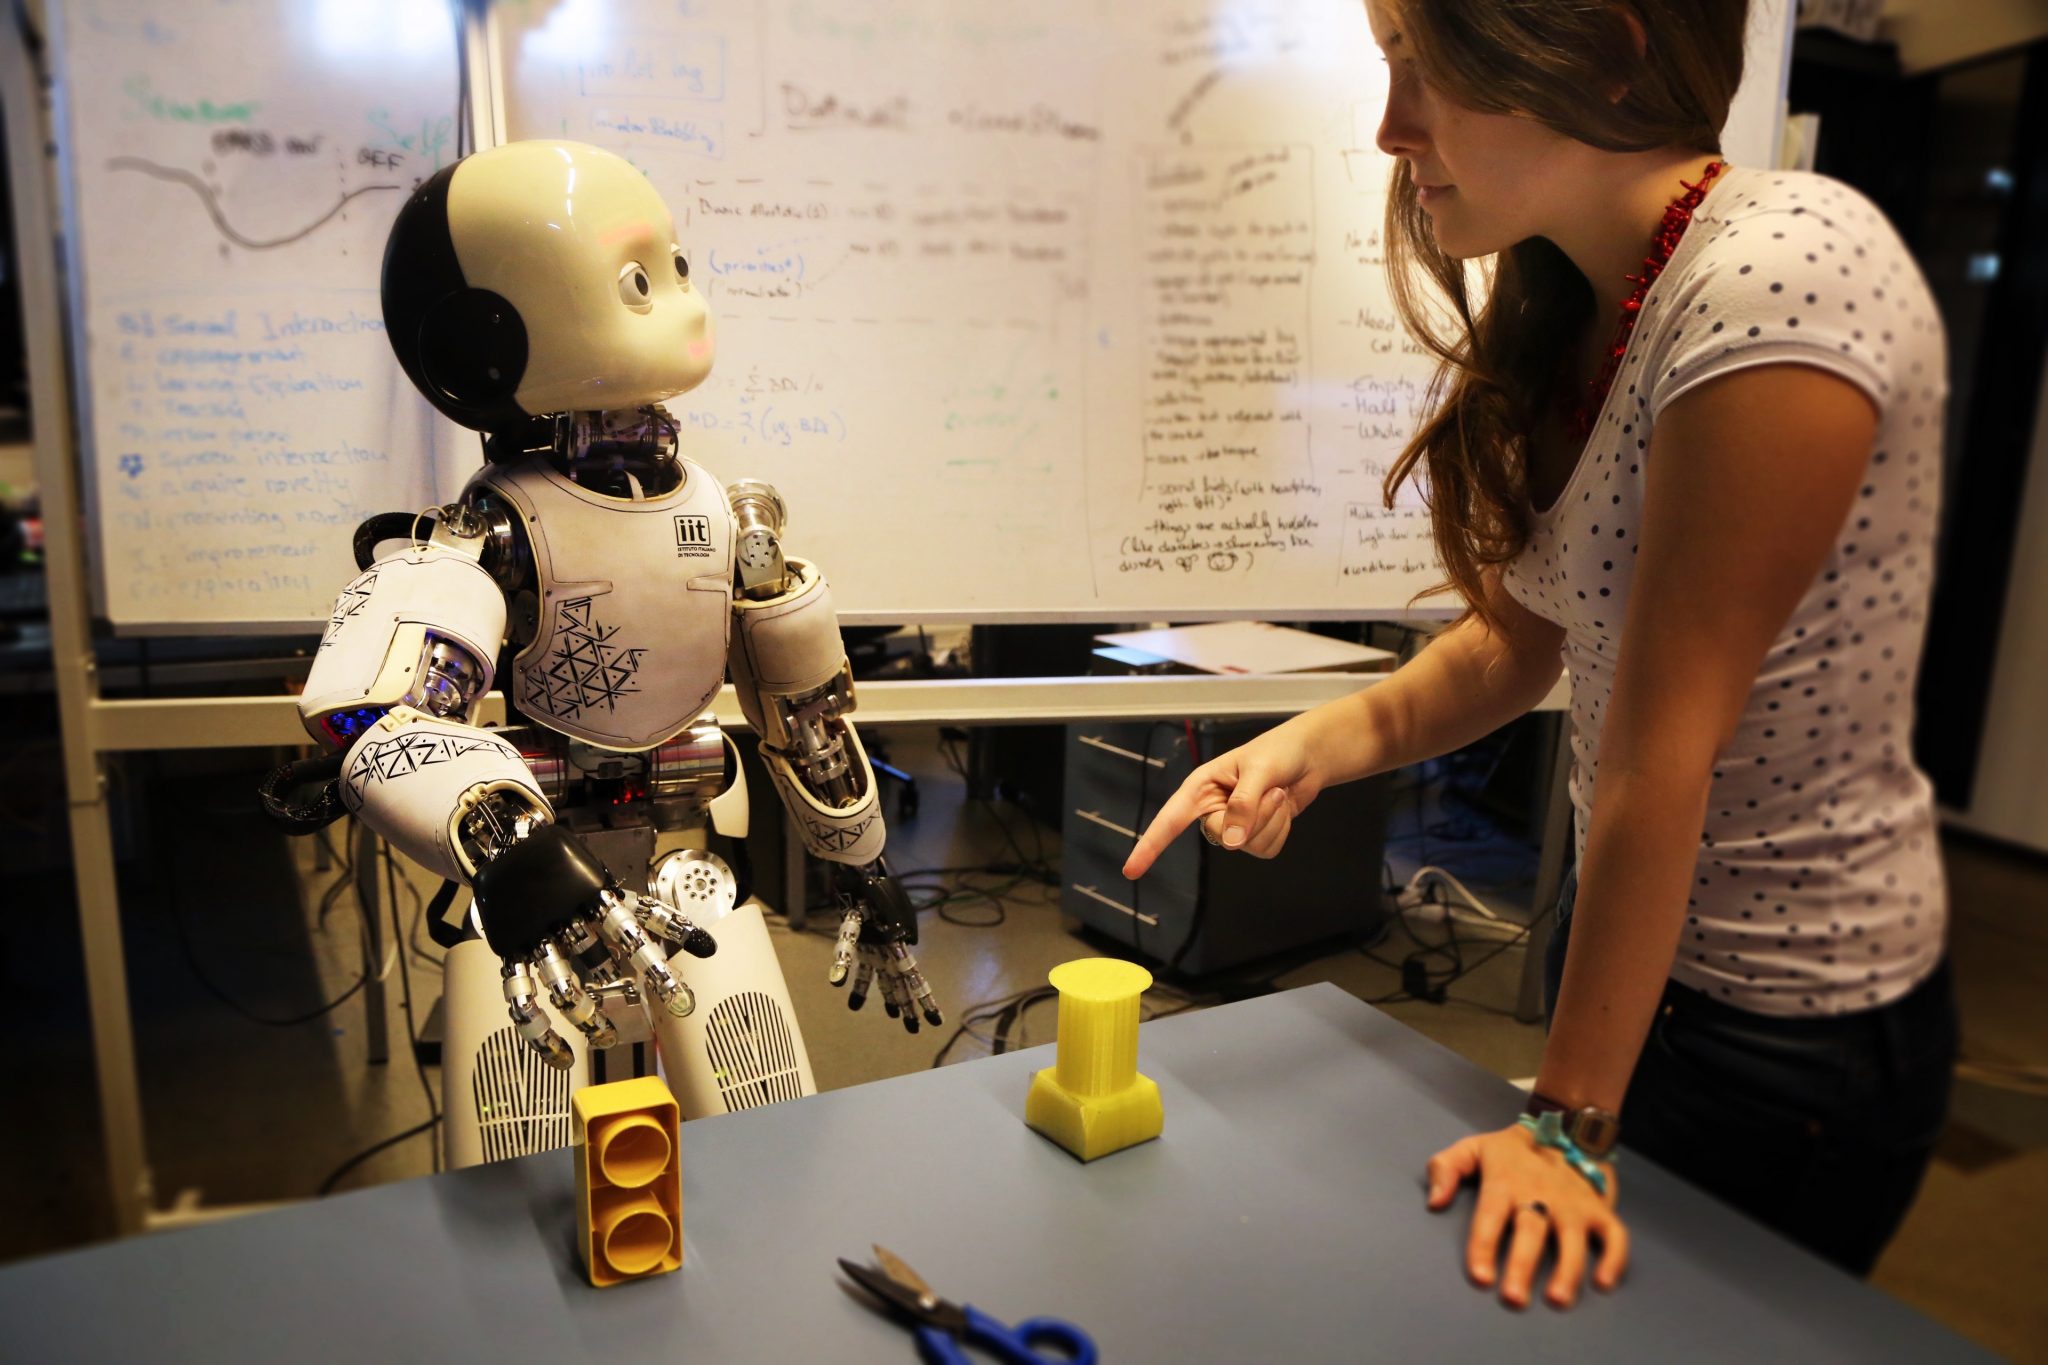
__Image:__ [1, Large Language Models in Action]
Looking Forward: The Future of Machine Learning Venues
As we gaze into the horizon, it’s evident that machine learning venues will continue to play an indispensable role in the evolution of AI. Their ability to adapt, evolve, and respond to the shifting landscapes of technology and society will dictate the pace and direction of machine learning advancements. With the advent of virtual and hybrid formats, the accessibility and inclusivity of these venues have never been greater, promising a future where anyone, anywhere can contribute to the field of machine learning.
In summary, machine learning venues encapsulate the collaborative spirit necessary for the continued growth of AI. By championing open discourse, innovation, and ethical considerations, they pave the way for a future where the potential of machine learning can be fully realized.
__Image:__ [2, Machine Learning Conference]
Concluding Thoughts
In reflecting upon my journey through the realms of AI and machine learning, from foundational studies at Harvard to my professional explorations at DBGM Consulting, Inc., the value of machine learning venues has been an ever-present theme. They have not only enriched my understanding but have also provided a platform to contribute to the broader discourse, shaping the trajectory of AI’s future.
To those at the forefront of machine learning and AI, I encourage you to engage with these venues. Whether through presenting your work, participating in discussions, or simply attending to absorb the wealth of knowledge on offer, your involvement will help drive the future of this dynamic and ever-evolving field.
 >
> >
> >
>

 >
> >
> >
>
 >
> >
> >
> >
> >
> >
> >
> >
>